Paint by numbers for adults is a big thing. Actually, it's been around since 1951, but now we can take it to the next level with a paint by number generator that transforms our personal photos into custom artwork.
Have you ever finished a pre-made paint by numbers kit and thought, "I wish I could paint something more meaningful to me"? That's exactly why I wanted to create my own paint by number kits—to display artwork that truly reflects my personal style and customizes the décor in my home. Furthermore, custom paint by numbers makes a perfect gift for loved ones on special occasions.
The best part? You can create your own paint by numbers with your favorite image using free paint by number conversion software. It's completely free! Whether you're a beginner or experienced painter, customizing your own paint by numbers project allows you to express your feelings in unique ways.
In this guide, we'll walk you through every step of creating and completing your own custom paint by numbers masterpiece—from choosing the right photo to framing your finished artwork. Let's transform your cherished memories into stunning paintings you'll be proud to display!
Choose the Right Photo for Your Painting
The success of your custom paint by number project begins with selecting the perfect photo. While any image can technically work, certain characteristics make some photos better candidates than others for transformation through a paint by number generator.
Use high-resolution images
High-resolution images serve as the foundation for outstanding custom paint by numbers. The quality of your original photo directly impacts the final result of your painting. Indeed, when using a photo to paint by number generator, submitting a blurry or low-quality image will invariably lead to disappointing results.
When selecting your photo, check these aspects:
- Clarity: Examine your image at full size to ensure it's sharp and clear
- Detail preservation: Higher resolution means more details can be captured by the paint by number generator free online
- Good lighting: Photos taken in poor lighting conditions may result in unexpected colors in your final template
"The better the photo, the better the painting" isn't just a suggestion—it's a fundamental rule for creating your own paint by number masterpiece. Most smartphones today take sufficiently high-resolution photos, although images from dedicated cameras often provide superior results.
Avoid cluttered backgrounds
A cluttered background can significantly complicate your painting experience. When using a custom paint by number generator, images with too many scattered details create templates with numerous tiny sections that can be frustrating to complete.
The ideal photo for conversion has:
- A clear subject as the main focus
- Minimal distracting background elements
- Good contrast between the subject and background
For example, a portrait where the background is naturally blurred works exceptionally well. One client submitted a high-quality photo with clear subjects against an out-of-focus background, resulting in an impressive final painting.
Additionally, if your image has a busy background but you still want to use it, consider editing the photo before submitting it to the paint by number generator. You can simplify backgrounds, adjust contrast, or add visual elements to enhance the composition—just remember that the main subject should remain the focus.
Best subjects for beginners
If this is your first custom paint by number project, choosing an appropriate subject can make the difference between an enjoyable experience and a frustrating one. For beginners, simplicity is key.
Novice painters should select:
- Images with fewer details and simpler compositions
- Subjects with clear outlines and defined color areas
- Photos that don't require intricate brushwork
Almost any subject can work for a custom paint by numbers project. You can use family photos, pet portraits, landscapes, or architectural images. However, for your first attempt, consider something with clear shapes and fewer color variations.
Selfies make excellent subjects for custom paint by numbers, especially ones that capture a special moment or expression. As stated by experienced painters, "Choose something that represents you, an image where you look special".
The size of your canvas should also match the complexity of your chosen photo. If your image contains numerous details (like a large family photo with more than five people), select a larger canvas size to ensure all details are preserved. Consequently, beginners might want to start with simpler images that work well on smaller canvases.
Remember that the paint by number generator will convert your photo based on its current state. Therefore, invest time in selecting or preparing the best possible image before submitting it. This initial effort will significantly enhance your painting experience and result in artwork you'll be proud to display.
Use a Free Paint by Number Generator
Creating your own custom paint by number artwork is surprisingly simple with today's online tools. Once you've selected the perfect photo, the next step is using a paint by number generator to transform it into a template you can paint.
Overview of PBNify and DigitPaints
Two excellent free options stand out in the world of custom paint by number creation: PBNify and DigitPaints.
PBNify is widely regarded as one of the simplest paint by number generators available. This browser-based tool operates entirely online and uses a straightforward drag-and-drop mechanism to convert your photos. What makes PBNify particularly appealing is its transparency—the source code is openly available, giving you confidence in how your images are processed. Despite being free, be aware that some users occasionally encounter minor bugs. If you experience any issues, checking the FAQ section often resolves them, or you might need to switch browsers.
DigitPaints offers another robust option for creating custom paint by numbers from your personal photos. Unlike many limited generators, DigitPaints allows you to create templates as large as you want, making it ideal for ambitious projects. The platform provides comprehensive results, generating not just your template but also a complete color palette to guide your painting process.
How to upload your photo
The process of uploading your photo is remarkably straightforward on both platforms.
With PBNify:
- Visit the main page at pbnify .com
- Drag and drop your selected image onto the designated area
- Wait momentarily as the system processes your photo
For DigitPaints, the procedure follows a similar pattern:
- Navigate to the generator page on digitpaints .com
- Select your desired canvas size first
- Upload the image from your device
- Allow the system to complete the generation process
Both platforms process your image directly in your browser, ensuring your photos remain private throughout the conversion process.
Adjusting detail and color levels
After uploading your photo, you'll have opportunities to fine-tune your template for optimal results.
On PBNify, you can:
- Click the options button to access customization settings
- Select how many colors you want in your final painting
- Adjust the size parameters (smaller size + fewer colors = faster processing)
- Modify additional options as needed for your specific project
- Click the green "process image" button to apply your changes
When working with DigitPaints, you can adjust:
- The number of colors used in your template
- The level of accuracy to make your project more precise or simpler based on your painting experience
These adjustments are crucial as they determine how complex your painting project will be. Fewer colors create a simpler painting suitable for beginners, whereas more colors produce a more detailed, nuanced result that experienced painters might prefer.
Once your image is processed, PBNify allows you to change the "SVG size multiplier" to 1 to view the entire image properly before downloading. Then you can save or download the canvas, the PBNified image, and your palette colors.
With DigitPaints, clicking "Download" provides you with a PDF file containing both your paint by numbers template and the color palette. This file is ready for immediate printing, either at home or at a professional print shop.
Both generators essentially convert your ordinary photos into paint-ready templates, complete with numbered sections and corresponding color guides—everything you need to begin your custom painting journey.
Download and Save Your Custom Template
After your photo is transformed into a paint by number template, you'll receive several important files that form the foundation of your custom painting project. Understanding and properly organizing these files ensures a smooth painting experience from start to finish.
What files you get: outline, filled, palette
Once you've processed your image through a paint by number generator, you'll typically receive a collection of files that serve different purposes throughout your painting journey:
- Outline Template - This is your primary painting guide that contains numbered sections corresponding to specific colors. Most generators provide this as a clean line drawing with clearly defined areas and numbers. This file is what you'll transfer to your canvas or paper for painting.
- Filled Template (Reference Image) - This colored version serves as your visual reference while painting. Instead of constantly referring to your original photo, this template shows exactly how colors should appear in each numbered section.
- Color Palette - Perhaps the most critical component, this file displays all colors used in your template with corresponding numbers. Depending on the generator, you might receive this palette in various formats:
- PDF format showing color swatches with numbers
- CSV file containing color codes for precise mixing
- PNG image of the palette for easy reference
- Additional Files - Some generators provide extra resources:
- Coloring page (simplified sketch version)
- Outline-only template (without numbers for those who prefer a cleaner look)
- Original reference image for comparison
The specific file formats vary across different generators. PBNify typically provides SVG files that scale beautifully to any size, alongside PNG options. Meanwhile, DigitPaints delivers a comprehensive PDF package containing both your template and color palette in one convenient file.
Most generators include detailed information about your template's specifications, such as canvas size, number of colors used, stroke width, segment complexity, and total number of segments. This technical information helps you understand the complexity of your project before you begin.
Tips for organizing your files
Proper file organization prevents frustration and ensures you can easily access your templates whenever inspiration strikes:
- Create dedicated folders for each paint by number project. Name these folders descriptively (e.g., "Mountain Sunset PBN - October 2025") rather than generic names like "Paint Project."
- Save multiple file versions in case you accidentally damage or lose your printed template. Many painters recommend storing both digital and physical copies as backups.
- Print color palettes separately from your templates and laminate them for durability. This protects them from paint splatters throughout your project.
- Store digital files in cloud storage services like Google Drive or Dropbox as well as on your computer. This provides an extra layer of protection against data loss.
- Keep a master spreadsheet if you create multiple paint by numbers, listing the project name, date created, canvas size, and where files are stored.
- Save a small amount of each mixed paint color in airtight containers until project completion. This practice, while related to file organization, ensures you can touch up any mistakes even weeks later.
Throughout your painting journey, these files serve as your roadmap. The outline guides your brush, the filled template inspires your vision, and the palette directs your color mixing. By thoughtfully organizing these resources from the beginning, you set yourself up for a successful and enjoyable custom painting experience.
When you've downloaded all necessary files, you're ready to move forward with printing and preparing your design—turning digital templates into tangible art materials you can touch and transform.
Print and Prepare Your Design
With your template downloaded, it's time to transform those digital files into a physical canvas ready for painting. This crucial step bridges the digital creation process and the hands-on artistic experience that makes custom paint by numbers so rewarding.
Printing options for different sizes
The size of your paint by numbers project significantly impacts both the painting experience and the final display impact. Standard paint by number canvases typically range from small 20×30cm pieces to impressive wall-sized 80×180cm masterpieces. Consider your painting experience level, available time, and where you'll display the finished piece when choosing your size.
For printing your template:
- Home printer option: Most standard home printers handle letter-size (8.5×11 inches) or A4 paper perfectly. This works well for smaller projects or when breaking larger designs into sections.
- Copy shop services: For larger designs or higher quality prints, consider using services at local copy shops like FedEx Office, Staples, or UPS Store. These shops can print on larger paper sizes and offer various paper quality options.
- Paper selection: Opt for slightly heavier paper (24-28 lb) that won't wrinkle easily when you apply paint. Matte paper works better than glossy as it prevents glare while you're working.
Remember that printing costs vary depending on size and paper quality. Naturally, smaller projects cost less to print, making them ideal for beginners testing their first custom paint by number creation.
How to tile large prints
Many custom designs won't fit on a single sheet of standard paper, yet tiling offers an elegant solution to this common challenge. Tiling involves breaking your large design into multiple printable pages that you'll reassemble.
To tile a large print effectively:
- Check if your paint by number generator offers a tiling option. Some automatically split larger designs into printable sections.
- Otherwise, use Adobe Reader's poster printing feature: Open your PDF, select Print > Poster > Scale, and choose your overlap percentage (10% works well).
- Number each tile on the back immediately after printing to avoid confusion during reassembly.
- Trim excess margins from each tile, leaving a small overlap between adjacent sections.
- Use removable tape to temporarily connect tiles and verify everything aligns correctly before transferring to canvas.
An overlap of about one inch between tiles ensures you won't miss any lines or numbers during the transfer process. Throughout this assembly, double-check number placement to ensure continuity across tile boundaries.
Using tracing methods for canvas
Once your template is printed, you'll need to transfer it onto your painting surface. Several reliable methods exist for this critical step:
Light pad method: Place your printed template under your canvas and use a light pad beneath both. The illumination will reveal the design through the canvas, allowing you to trace directly. This technique works exceptionally well for thinner canvas materials but may be challenging with thicker artist canvases.
Graphite transfer: Rub graphite (from a soft pencil) on the back of your printed template, position it on your canvas, and trace over the lines with firm pressure. The graphite transfers the design cleanly onto your canvas.
DIY tracing paper: Create your own tracing paper by applying oil to standard printing paper, allowing it to dry completely. This homemade tracing paper works similarly to store-bought options at a fraction of the cost.
Projector method: For very large canvases, project your digital template directly onto the canvas and trace the projected image. This eliminates printing entirely for oversized projects.
After tracing, verify all numbers are clearly visible and section boundaries are well-defined before beginning to paint. Moreover, let your traced canvas dry completely before starting to paint to prevent smudging your carefully transferred design.
By carefully printing and preparing your custom template, you've laid the groundwork for a successful painting experience with your personalized paint by numbers project.
Transfer the Design to Canvas or Paper
Now that your paint by number template is ready, the next crucial step is transferring this design onto your final painting surface. This stage bridges the digital and physical aspects of your custom paint by number project, setting the foundation for a successful painting experience.
Using matte medium or graphite transfer
The matte medium transfer method offers an excellent way to add imagery to your canvas or mixed media works. For this technique, you'll need:
- Photocopy or laser print of your template (ink jet prints won't work)
- Matte medium
- Foam brush or wide brush
- Brayer or old plastic card
- Water container and sponge
- Optional: hair dryer
To execute a matte medium transfer:
- Apply a smooth, thick coat of matte medium to the front side of your printed template using a foam brush (ideal because they leave fewer streaks)
- Flip the image over onto your canvas or background surface
- Use a brayer or plastic card to smooth out the image, ensuring solid contact with no air bubbles
- Allow to dry completely (a hair dryer can speed this process)
- Once dry, dampen a sponge and work in small circular motions to remove the paper backing
- Repeat the dampening and rubbing process until you achieve the desired clarity
- Apply a final coat of matte medium to seal the transferred image
Alternatively, the graphite transfer method provides a simpler approach. Begin by shading the entire back of your printed template with a regular lead pencil. Position the template on your canvas with the graphite-covered side down. Trace the lines firmly with a pen or pointed object, applying enough pressure to transfer the graphite onto your surface.
Commercial transfer papers offer yet another option. These papers are coated with fine graphite or graphite-like substances that transfer designs via stylus or pen onto various surfaces including paper, canvas, wood, and more. Products like Saral Transfer Paper are wax-free, creating clean, crisp tracings that can be erased and painted over without smudging.
Tips for avoiding wrinkles and smudges
Wrinkles can ruin a carefully prepared canvas. Fortunately, several preventative measures can help maintain a smooth working surface:
For canvas wrinkles:
- If wrinkles appear on your canvas, try a gentle ironing technique. Lightly iron the back of your canvas on a low setting to smooth out unwanted creases
- Apply even pressure when transferring designs to prevent creating new wrinkles
- Store your canvas flat rather than rolled once the design is transferred
To prevent smudging:
- Allow transferred designs to dry completely before beginning to paint
- When using graphite transfer methods, apply a light fixative spray to prevent smudging
- With matte medium transfers, ensure the final sealing coat is completely dry prior to starting your painting
- Handle your canvas by the edges or back once the design is transferred
- Consider wearing cotton gloves while working with your transferred design
For fabric transfers specifically, Saral paper offers an advantage as the transfer lines can be sponged, washed out, or brushed off. Importantly, unlike other transfer papers, a hot iron will not permanently set these lines.
When using any transfer method, test on a small area first to ensure compatibility with your specific canvas or paper. Remember that the quality of your transfer directly impacts the ease of your painting experience—taking time to execute this step properly pays dividends throughout your custom paint by number project.
After successfully transferring your design, you'll have a perfectly prepared canvas ready for the next exciting stage of your creative journey—mixing and applying your paints to bring your personalized artwork to life.
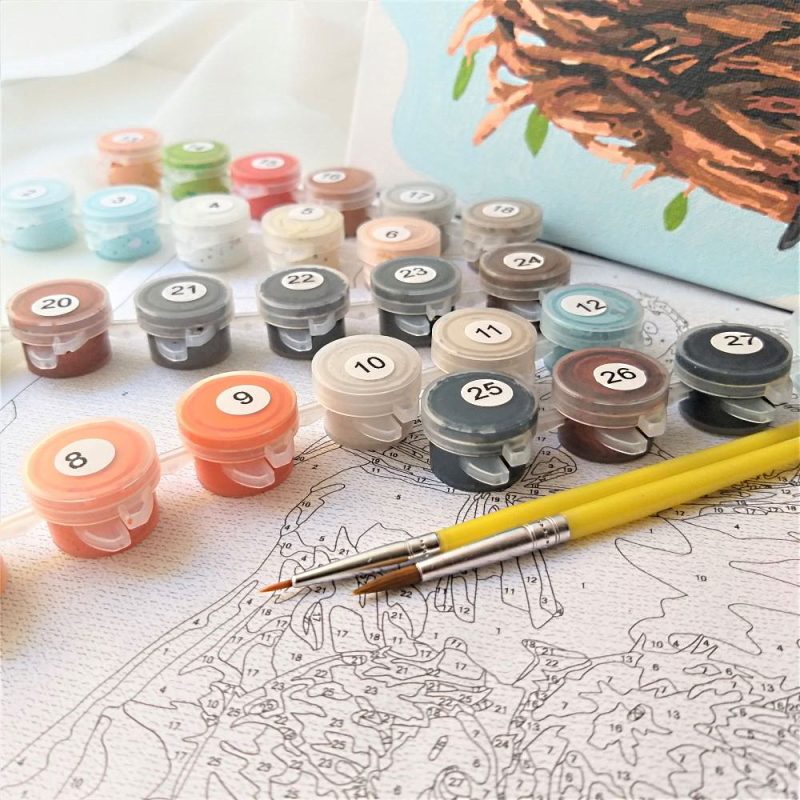
Mix and Label Your Paint Colors
After transferring your design, preparing your paints becomes the next critical step in your custom paint by number journey. The colors make your artwork come alive, so mixing and organizing them properly ensures a smooth painting process from start to finish.
Using the color palette from the generator
The color palette provided by your paint by number generator is your roadmap to color accuracy. Each numbered section on your canvas corresponds to a specific color in this palette. Free paint by number generators typically provide complete color information in several formats:
- RGB values (digital color codes)
- CMYK percentages (for print matching)
- Visual color swatches with corresponding numbers
Print your palette page on high-quality paper or cardstock for durability throughout your project. Consider laminating it or placing it in a clear plastic sleeve to protect it from paint splatters. Subsequently, arrange your workspace with this palette prominently displayed for easy reference as you work.
How to mix acrylics accurately
Achieving precise color matches requires careful mixing techniques. Initially, start with small amounts of paint when creating custom colors—you can always mix more if needed. Many artists use a paintbrush to scoop out colors from their primary paints, making sure to clean the brush thoroughly between different colors.
For consistent results:
- Work in good lighting conditions—natural daylight is ideal for color accuracy
- Mix slightly more paint than you think you'll need for a particular area
- Test colors on scrap paper before applying to your canvas
- Record your mixing "recipes" if you create a custom shade
Small medicine measuring cups provide excellent mixing containers for your custom paint colors. These transparent cups allow you to see the color from all angles, helping you judge consistency and tone more accurately.
Storing paint in small containers
Once you've mixed your perfect colors, proper storage prevents waste and ensures color consistency throughout your project. Acrylic paint dries quickly, hence finding appropriate storage solutions is essential.
Practical storage options include:
- Small plastic containers with airtight lids
- Empty contact lens cases for small amounts
- Pill organizers for multiple small color batches
- Mini food storage containers
Label each container with the corresponding number from your paint by number template. Additionally, store these containers in a cool, dark place between painting sessions to extend their usability. Notably, a drop of water or acrylic medium on top of your stored paint can help prevent it from drying out.
Throughout your painting process, maintaining organized paint containers lets you work on your custom paint by number project in multiple sessions without the frustration of remixing colors. This organization is particularly valuable for complex designs created with free paint by number generators, which may contain dozens of distinct color areas.
Start Painting by Numbers
With your canvas prepared and paints mixed, the most enjoyable part begins—actually painting your custom creation. The technique you use can make a significant difference in the quality of your finished artwork.
Paint light to dark or large to small
Two main approaches exist for tackling your custom paint by number project. Interestingly, experts often disagree on which method works best:
The dark-to-light approach gives you an immediate sense of your painting's structure. Starting with darker hues, typically part of the background, helps you understand where your painting is headed. This method offers a clearer view of the overall composition early in your process.
Conversely, many artists prefer beginning with the lightest colors and gradually working toward darker shades. This technique helps maintain color integrity and typically produces better results. For instance, when painting a landscape, you might start by filling in the sky with the lightest blue paint before moving to darker elements.
Ultimately, both methods are valid—choose whichever feels most intuitive for your first custom paint by number project.
How to avoid smudging
Smudging can quickly ruin hours of careful work. Fortunately, a simple strategy prevents this common issue: always work from top to bottom.
Right-handed painters should start from the top-left corner, while left-handed painters should begin from the top-right corner. This technique ensures your hand never rests on freshly painted areas as you move across and down the canvas.
Beyond directional painting, these practical steps help avoid smudges:
- Allow each section to dry completely before painting adjacent areas
- Use a piece of clean paper under your hand when working on detailed sections
- Keep a paper towel nearby to quickly wipe accidental touches
- Work in a well-ventilated area to speed drying time
Fixing mistakes as you go
Even experienced artists make mistakes—the difference lies in knowing how to fix them. Should you paint outside the lines or use the wrong color, don't panic. Wait for the paint to dry completely, afterward cover the mistake with the correct color. Often, multiple layers may be necessary to completely hide the error.
For immediate corrections on wet paint, a slightly damp Q-tip works perfectly to gently remove mistakes before they dry. Keep several clean cotton swabs in your painting kit expressly for this purpose.
Remember that perfection isn't necessary—small imperfections often add character to your custom paint by number artwork. Focus on enjoying the creative process rather than achieving flawless execution. Each custom design generated through a free paint by number generator already accounts for slight variations in technique.
Seal and Frame Your Finished Artwork
Completing your custom paint by number artwork marks just the beginning of its journey. The final steps of sealing and framing transform your creation into a lasting treasure worthy of display.
Using varnish or matte medium
Sealing your finished painting serves multiple purposes—it protects against dust, moisture, and UV damage while enhancing color vibrancy. You have several options:
- Acrylic varnish: Available in gloss, satin, or matte finishes to match your desired esthetic
- Spray varnish: Ideal for paintings with intricate details, offering even application
- Mod Podge: A versatile sealer that works well for various projects
Apply your chosen sealer in light, even coats. For brush-on sealants, use slow, consistent strokes in the same direction. Allow each coat to dry completely before adding another layer.
Framing options for display
Framing choices dramatically impact your artwork's presentation:
- No frame: Budget-friendly option if you plan to frame it yourself later
- DIY frame: Provides materials for self-assembly, including wooden frame and hardware
- Stretched/pre-framed: Professional-looking finish, ready to hang immediately
Preserving your painting long-term
For lasting protection, consider these preservation strategies:
- Store unframed canvases flat or gently rolled
- Add glass or acrylic covers to framed pieces for additional protection
- Keep artwork away from direct sunlight to prevent color fading
- Re-apply sealant every few years if your painting shows signs of wear
Conclusion
Creating your own custom paint by numbers artwork offers a rewarding journey from digital image to handcrafted masterpiece. Throughout this guide, we've explored every step needed to transform cherished photos into personalized paintings you'll proudly display.
The process begins with selecting high-quality photos that capture meaningful moments. Consequently, you'll achieve better results using images with clear subjects and uncluttered backgrounds. Free online generators like PBNify and DigitPaints then transform ordinary photos into numbered templates, complete with color palettes specifically matched to your image.
Your careful preparation makes all the difference. Proper printing, canvas transfer, and paint organization establish the foundation for a successful project. The painting itself becomes a meditative experience as you watch your image gradually emerge through patient application of colors.
The final steps of sealing and framing protect your artwork while enhancing its presentation. Your completed custom paint by numbers piece represents something far more valuable than store-bought alternatives – it embodies personal memories, creative effort, and artistic achievement.
Beyond the finished product, this creative process offers numerous benefits. Paint by numbers enhances focus, reduces stress, and provides a sense of accomplishment that mass-produced kits simply can't match. Additionally, custom projects make thoughtful, personalized gifts that recipients treasure.
Most importantly, custom paint by numbers makes artistic expression accessible regardless of skill level. Anyone can create something beautiful and meaningful through this structured approach to painting.
We hope this guide inspires you to create your own custom paint by numbers masterpiece. Take that special photo, transform it through a free generator, and enjoy the satisfaction of bringing it to life with your own hands. The artistic journey awaits – your memories deserve to be celebrated as artwork you'll cherish for years to come.